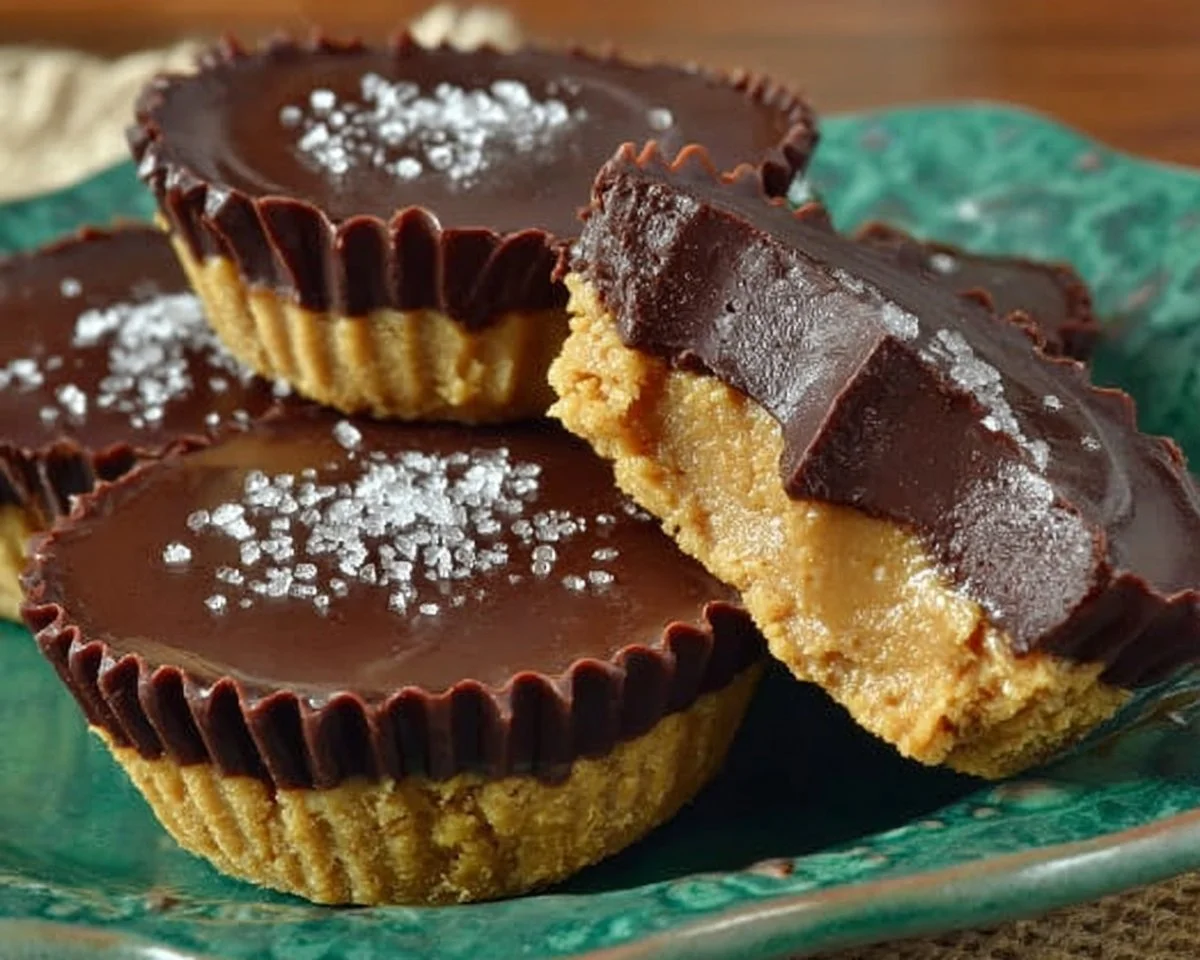
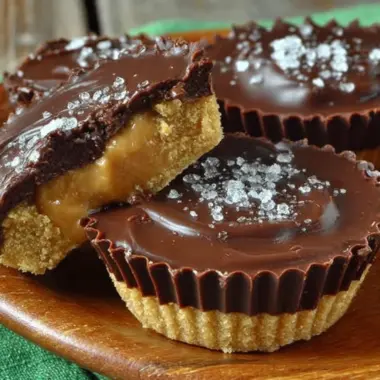
Creamy, indulgent, and impossibly easy, these Homemade Peanut Butter Cups are the perfect sweet treat when you want something nostalgic and made-from-scratch. Think velvety peanut butter tucked inside a crisp shell of rich chocolate — simple textures, bold flavors, and pure comfort in every bite. Fun fact: peanut butter cups were inspired by the desire to combine two pantry staples into one irresistible candy — and today you can make them fresher (and cheaper) than store-bought versions.
This recipe shines because it’s straightforward, quick to put together, and beloved by kids and adults alike. If you love quick homemade confections, you might also enjoy my other take on peanut butter treats over at our homemade peanut butter cups post which dives into variations and serving ideas. Ready to make a batch that will disappear fast? Let’s get started — you’ll be delighted at how fast these come together.
What is Homemade Peanut Butter Cups?
What’s in a name? Homemade Peanut Butter Cups are exactly what they sound like: little cups made of chocolate filled with a creamy peanut butter center. Sounds simple, right? But have you ever wondered who decided it was a “cup” and not a “puck” or a “disk”? Maybe someone had a muffin tin handy and a bright idea — or maybe they just loved the phrase “the way to a man’s heart is through his stomach.” Who can argue with that logic when a bite this good exists?
Playfully, you might call them peanut butter hugs encased in chocolate. Try them and see if you don’t start inventing your own names. Go on — make a batch and spread the joy.
Why You’ll Love This
- Main highlight: The contrast between the silky peanut butter filling and the glossy chocolate shell is pure satisfaction. Each bite gives you creaminess, a slight snap of chocolate, and a comforting nutty finish.
- Cost-saving benefits: Making these at home saves money compared with store-bought specialty cups, and you control ingredient quality — choose natural peanut butter or premium chocolate for a gourmet twist without the premium price tag.
- Flavorful toppings and variations: Sprinkle flaky sea salt, chopped peanuts, or a drizzle of white chocolate on top for texture and visual appeal. These little touches elevate a humble treat into something spectacular.
If you enjoy this, a related favorite on the blog is my chewy peanut butter brownies — another great way to use peanut butter in a decadent dessert. Give them a try when you want something a bit more cake-like and shareable.
How to Make
Quick Overview
This recipe is delightfully easy: a smooth peanut butter filling, a melted chocolate shell, and simple assembly in a muffin tin. Prep takes about 10 minutes, with freezing time adding 30–40 minutes for setting. The standout element is the silky peanut butter center that pairs perfectly with semi-sweet chocolate.
Prep and cook time
- Active prep: 10 minutes
- Setting time: 30–40 minutes
- Total time: about 45 minutes
Ingredients
- 1 cup creamy peanut butter, room temperature
- 1/4 cup unsalted butter, melted and slightly cooled
- 1/4 cup powdered sugar, sifted if lumpy
- 1/2 teaspoon vanilla extract
- 2 cups semi-sweet chocolate chips, for melting
- 1 tablespoon coconut oil, to help the chocolate melt smoothly
Directions
- Prepare the Peanut Butter Filling: In a mixing bowl, combine 1 cup creamy peanut butter, 1/4 cup melted unsalted butter, 1/4 cup powdered sugar, and 1/2 teaspoon vanilla extract. Stir until completely smooth and homogenous. If the mixture feels too soft, chill for 5 minutes to firm slightly. Set aside.
- Melt the Chocolate: In a microwave-safe bowl, combine 2 cups semi-sweet chocolate chips and 1 tablespoon coconut oil. Microwave in 30-second intervals, stirring thoroughly between bursts until the chocolate is fully melted and glossy. Avoid overheating to prevent seizing.
- Assemble the Peanut Butter Cups: Line a muffin tin with paper liners. Spoon about 1 to 1.5 teaspoons of melted chocolate into each liner to create a base layer that covers the bottom. Use the back of the spoon to spread slightly. Freeze the tin for 10 minutes until the chocolate is firm.
- Add Filling and Top: Place a spoonful (about 1 teaspoon) of the peanut butter mixture on top of each chilled chocolate base, leaving a small border around the edges. Spoon more melted chocolate over the peanut butter to cover it completely and smooth the tops. Return to the freezer and chill for 20–30 minutes, or until fully set.
- Final Setting: Once the chocolate is firm, gently remove the peanut butter cups from the liners and transfer them to an airtight container. Store in the refrigerator or freezer depending on how firm you like them.
What to Serve With
- A cold glass of milk or a frothy iced coffee for classic pairing
- Fresh fruit like sliced apples or strawberries to cut through the richness
- A scoop of vanilla ice cream for an indulgent dessert plate
- Crushed pretzels or salted crackers on the side for a salty-sweet contrast
These pairings make serving fun whether it’s a casual snack or a simple dessert after dinner.
Top Tips for Perfecting
- Ingredient substitutions: Use natural peanut butter for a more pronounced peanut flavor, but reduce added oil when mixing if it’s very runny. Swap coconut oil for vegetable oil if you prefer.
- Timing adjustments: If your kitchen is warm, pop the muffin tin in the freezer for a few extra minutes between steps to keep fillings from melting into the chocolate.
- Flavor enhancements: Stir a teaspoon of honey or a pinch of cinnamon into the peanut butter mix for a subtle twist.
- Common mistakes to avoid: Don’t overheat chocolate in the microwave — stir frequently. Avoid adding too much peanut butter filling; it should sit comfortably within the chocolate edge.
- Presentation trick: Sprinkle flaky sea salt or press a piece of chopped peanut on top before the final chill for a professional-looking finish.
Storing and Reheating Tips
- Refrigeration: Store in an airtight container in the refrigerator for up to 2 weeks. Chilling keeps the chocolate firm and the peanut filling creamy.
- Freezing: Freeze for up to 3 months. Thaw in the refrigerator for 20–30 minutes before serving to soften slightly while retaining shape.
- Shelf life details: At room temperature they will soften quickly; keep them cool if serving shortly after making.
- Reheating: Avoid microwaving; if you want softer centers, let refrigerated cups sit at room temperature for 10–15 minutes before eating.
FAQs
Can I use crunchy peanut butter instead of creamy?
Yes, crunchy peanut butter works great and adds a pleasant texture. Keep in mind the filling will be slightly grainier and may require a bit more smoothing when spooning into cups.
Do I have to use coconut oil in the chocolate?
No, coconut oil helps with shine and a smoother melt, but you can substitute a neutral oil like vegetable oil or skip it if your chocolate melts well on its own.
Can I make these nut-free?
Absolutely. Substitute the peanut butter with a seed butter like sunflower seed butter to make a nut-free version suitable for allergy-sensitive households.
How do I prevent the chocolate from seizing?
Heat in short increments, stir between each, and add a small amount of oil (like the tablespoon of coconut oil) to stabilize the melt. Avoid any water contact with chocolate.
Can I double the recipe and freeze extras?
Yes — doubling is easy. Freeze extras in layers with parchment paper between them so they don’t stick, and store in a freezer-safe container for up to 3 months.
Conclusion
These Homemade Peanut Butter Cups are a must-try if you love quick, satisfying treats that taste better than store-bought. They’re simple to make, budget-friendly, and endlessly adaptable with toppings and fillings. Whether you’re making them for a party, a snack stash, or a gift, they’re guaranteed to disappear fast and earn compliments.
For more inspiration and a different take on a homemade version, check out this detailed guide on Homemade Peanut Butter Cups – i am baker, and if you want another from-scratch perspective, see the Homemade Peanut Butter Cups (From Scratch) – Fifteen Spatulas recipe for additional tips and variations. Enjoy making these — and don’t forget to share them with family or friends!
Homemade Peanut Butter Cups
Equipment
- Mixing Bowl
- Muffin Tin
- Microwave-Safe Bowl
Ingredients
Ingredients
- 1 cup Creamy Peanut Butter Room temperature
- 1/4 cup Unsalted Butter Melted and slightly cooled
- 1/4 cup Powdered Sugar Sifted if lumpy
- 1/2 teaspoon Vanilla Extract
- 2 cups Semi-sweet Chocolate Chips For melting
- 1 tablespoon Coconut Oil To help the chocolate melt smoothly
Instructions
- Prepare the Peanut Butter Filling: In a mixing bowl, combine creamy peanut butter, melted unsalted butter, powdered sugar, and vanilla extract. Stir until completely smooth and homogenous. If the mixture feels too soft, chill for 5 minutes to firm slightly. Set aside.
- Melt the Chocolate: In a microwave-safe bowl, combine semi-sweet chocolate chips and coconut oil. Microwave in 30-second intervals, stirring thoroughly between bursts until the chocolate is fully melted and glossy. Avoid overheating to prevent seizing.
- Assemble the Peanut Butter Cups: Line a muffin tin with paper liners. Spoon about 1 to 1.5 teaspoons of melted chocolate into each liner to create a base layer that covers the bottom. Use the back of the spoon to spread slightly. Freeze the tin for 10 minutes until the chocolate is firm.
- Add Filling and Top: Place a spoonful (about 1 teaspoon) of the peanut butter mixture on top of each chilled chocolate base, leaving a small border around the edges. Spoon more melted chocolate over the peanut butter to cover it completely and smooth the tops. Return to the freezer and chill for 20–30 minutes, or until fully set.
- Final Setting: Once the chocolate is firm, gently remove the peanut butter cups from the liners and transfer them to an airtight container. Store in the refrigerator or freezer depending on how firm you like them.