Creamy, chocolate-topped, and impossibly simple — these Easy No Bake Peanut Butter Bars are the kind of treat that disappears faster than you can say “just one more square.” They’re rich without being fussy and perfect for busy days, potlucks, or when you need a comforting treat that everyone will love. Fun fact: no-bake bars have been a pantry hero since homemade desserts became about convenience as much as flavor.
If you love quick peanut butter treats, you’ll find something familiar in this recipe — it shares the same satisfying texture as our beloved peanut butter no-bake cookies but in a fudgier, sliceable form that’s easier to share. Because this recipe requires no oven and only a handful of pantry staples, it’s ideal for cooks of any level and makes a great last-minute dessert. Give them a try and watch them become a new family favorite.
What is Easy No Bake Peanut Butter Bars?
What’s in a name? These bars are exactly what they say: peanut butter-forward, easy to pull together, and no oven required. Who named them? Probably someone who loved peanut butter and hated preheating. Why “easy”? Because they come together in minutes and chill into a dessert that’s both creamy and firm. Ever wonder why comfort food is so persuasive? Maybe it’s because, as the old saying goes, “the way to a man’s heart is through his stomach.” Whether you’re feeding friends or sneaking a late-night snack, these bars are the answer. Try them — you’ll see why the name fits.
Why You’ll Love This
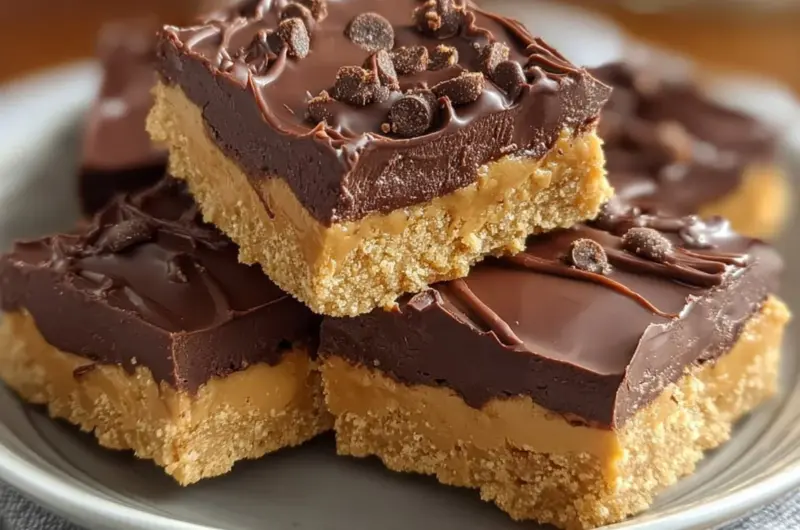
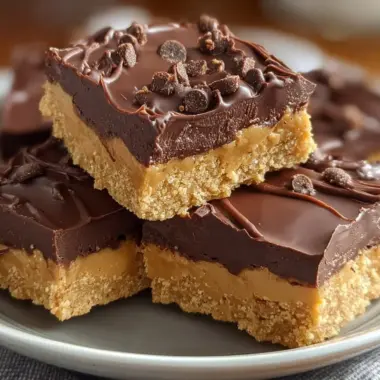
- Irresistible main highlight: The base layer is buttery, slightly crunchy from graham crumbs, and intensely peanut buttery, while the glossy chocolate top creates a perfect sweet-salty contrast that melts on the tongue.
- Cost-saving benefits: Made from common pantry staples — butter, graham cracker crumbs, peanut butter, powdered sugar, and chocolate chips — these bars are much cheaper than store-bought specialty treats and yield a large pan to share or freeze.
- Flavorful ingredients and toppings: Use creamy peanut butter for a silky texture, and choose milk chocolate chips for a classic, nostalgic taste. Sprinkle flaky sea salt or chopped peanuts on top for an extra layer of flavor and texture.
If you love rich chocolate and peanut butter combinations, you might also enjoy our take on chocolate peanut butter brownie bars for a different kind of indulgence. Ready to make them? Let’s get to the simple steps.
How to Make
Quick Overview
These bars are straightforward: press a peanut butter–graham cracker base into a pan, melt a chocolate-peanut butter topping, spread it over the base, chill, and slice. No baking, no fuss. Expect a firm, sliceable texture with a creamy interior and a glossy chocolate finish. Prep time is about 15 minutes and chilling time is at least 1 hour.
Ingredients
- 1 cup butter, melted
- 2 cups graham cracker crumbs, finely ground
- 2 cups confectioners’ sugar (powdered sugar), sifted if lumpy
- 1 cup peanut butter, smooth, room temperature
- 4 tablespoons peanut butter, for melting with chocolate (smooth)
- 1.5 cups milk chocolate chips
Directions
- In a medium bowl, combine 1 cup melted butter, 2 cups finely ground graham cracker crumbs, 2 cups confectioners’ sugar, and 1 cup peanut butter. Stir until the mixture is thoroughly combined and holds together when pressed. Use a spatula to scrape the bowl sides to incorporate all crumbs.
- Press the mixture evenly into the bottom of an ungreased 9×13 inch pan for standard thickness. If you prefer thicker bars, use a 9×9 inch pan and press the mixture firmly and evenly into the pan so there are no air pockets.
- In a microwave-safe bowl, combine 1.5 cups milk chocolate chips and the remaining 4 tablespoons peanut butter. Microwave in 30-second intervals, stirring after each interval, until the chocolate is smooth and fully melted. Be careful not to overheat — stir well between bursts to avoid scorching.
- Immediately spread the warm chocolate-peanut butter mixture evenly over the pressed peanut butter base. Use a spatula to smooth it into an even layer. For a decorative touch, sprinkle chopped peanuts or flaky sea salt on top while the chocolate is still soft.
- Refrigerate the pan for at least one hour or until the chocolate is firm and the bars are set. Once chilled, lift the bars from the pan (use parchment paper overhang if desired) and cut into squares with a sharp knife. Store chilled.

What to Serve With
- Cold milk or iced coffee for a classic pairing that balances richness.
- Fresh fruit like apple slices or banana to cut through the sweetness and add brightness.
- A simple scoop of vanilla ice cream for an over-the-top dessert experience.
- A cup of black coffee or espresso for adults — the bitterness pairs beautifully with the chocolate-peanut butter combo.
- For gatherings, serve alongside other small bites like salted pretzels or mixed nuts to echo the salty-sweet theme.
Top Tips for Perfecting
- Ingredient substitutions: Substitute crunchy peanut butter for smooth if you want added texture, or use natural peanut butter but reduce stirring time to prevent oil separation. For a reduced-sugar version, try sugar-free powdered sugar and dark chocolate chips.
- Timing adjustments: Chill for at least one hour, but two hours yields firmer bars that slice cleanly. If in a hurry, a 20–30 minute stint in the freezer helps speed things up.
- Flavor enhancements: Add a teaspoon of vanilla extract to the base for extra depth. A pinch of flaky sea salt on top brightens the flavors and enhances sweetness.
- Common mistakes to avoid: Don’t skip pressing the base firmly — loose crumbs lead to crumbly bars. When melting chocolate, stir frequently and avoid overheating; burnt chocolate becomes grainy.
- Presentation tip: Use a hot, clean knife (dip in hot water and dry) for smooth, neat slices.
Storing and Reheating Tips
- Refrigeration: Store bars in an airtight container in the refrigerator for up to 2 weeks. Place parchment between layers to prevent sticking.
- Freezing: Individually wrap bars in plastic wrap and store in a freezer-safe container or bag for up to 3 months. Thaw in the refrigerator overnight before serving.
- Shelf life details: At room temperature in a cool, dry place, they can last about 2 days; refrigeration is recommended for best texture and food safety.
- Reheating methods: These bars are best served chilled or at room temperature. If you prefer them slightly softer, let them sit at room temperature for 10–15 minutes before serving. Avoid microwaving large squares as the chocolate may melt unevenly.
FAQs
Can I use natural peanut butter in this recipe?
Yes, you can, but natural peanut butter tends to separate. Stir it well before measuring and be mindful that the base may be slightly oilier. Chill longer for a firmer set.
Can I make these bars vegan?
Yes. Use vegan butter, dairy-free chocolate chips, and ensure your powdered sugar is vegan-friendly. The texture may differ slightly but will still be delicious.
Can I use a different type of cookie crumb instead of graham crackers?
Absolutely. Digestive biscuits, vanilla wafers, or even crushed shortbread work well and will alter the flavor subtly.
How do I get clean slices when cutting the bars?
Use a sharp knife warmed under hot water, then wiped dry, and make decisive straight cuts. Wipe the knife between cuts for the cleanest edges.
Can I double the recipe for a larger crowd?
Yes, you can double and bake in two pans or use a larger sheet pan. Keep thickness in mind and adjust chilling time if needed.
Conclusion
These Easy No Bake Peanut Butter Bars are proof that simple ingredients and a little chill time can produce a dessert that’s nostalgic, crowd-pleasing, and totally stress-free. They’re perfect for busy weeks, parties, or when you want a reliable treat that’s easy to scale and customize. If you want more inspiration or a slightly different take on the chocolate-peanut butter combo, check out this excellent No-Bake Chocolate Peanut Butter Bars – Sally’s Baking for variations and tips. Give these bars a try, share them with friends, and enjoy every sweet, peanut-buttery bite.
Easy No Bake Peanut Butter Bars
Equipment
- Mixing Bowl
- 9x13 inch Pan
- Microwave-Safe Bowl
- Spatula
Ingredients
Ingredients
- 1 cup Butter, melted
- 2 cups Graham cracker crumbs, finely ground
- 2 cups Confectioners’ sugar (powdered sugar), sifted if lumpy
- 1 cup Peanut butter, smooth, room temperature
- 4 tablespoons Peanut butter, for melting with chocolate smooth
- 1.5 cups Milk chocolate chips
Instructions
- In a medium bowl, combine melted butter, graham cracker crumbs, confectioners’ sugar, and peanut butter. Stir until thoroughly combined.
- Press the mixture evenly into the bottom of an ungreased 9x13 inch pan.
- In a microwave-safe bowl, combine milk chocolate chips and remaining peanut butter. Microwave in 30-second intervals, stirring until smooth.
- Spread the chocolate-peanut butter mixture evenly over the pressed base. Optionally, sprinkle chopped peanuts or flaky sea salt on top.
- Refrigerate for at least one hour until firm. Cut into squares and store chilled.