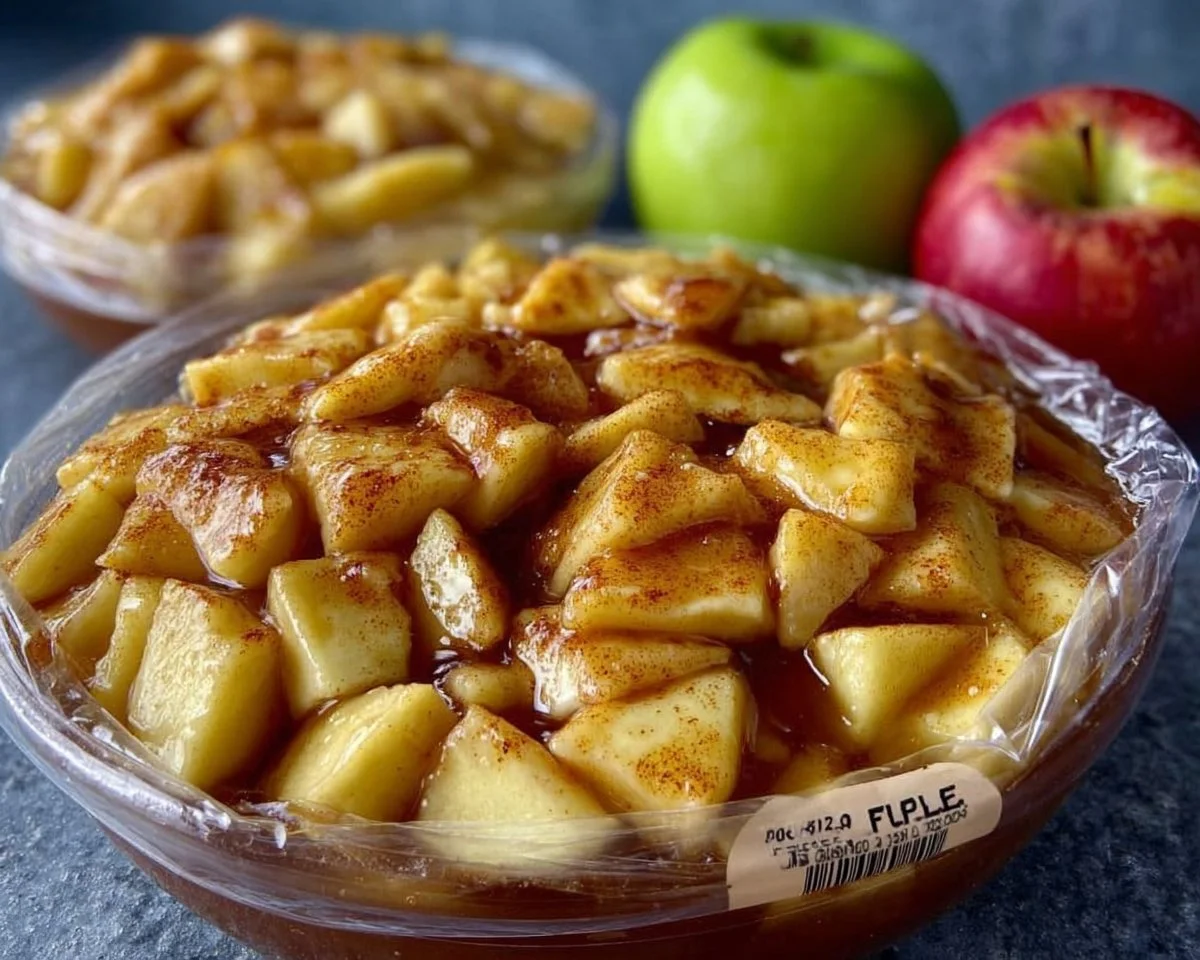
Creamy, juicy, and packed with warm cinnamon spice, this Freezer Apple Pie Filling is the shortcut every busy baker needs in their kitchen. Imagine pulling a jar from the freezer and whipping up a fresh apple pie or a skillet dessert in minutes — comforting, homey, and utterly delicious. Fun fact: many home cooks make this in late summer when apples are abundant so they can enjoy pie all winter long. If you love quick convenience without sacrificing homemade flavor, this recipe is for you.
This recipe stands out because it is simple to prepare, requires no fancy equipment, and is family-friendly — kids will happily help peel apples or stir the bubbling filling. If you enjoyed our flaky apple pie biscuits, you’ll find this filling complements them beautifully and makes weeknight desserts effortless. Try it and you’ll see why it becomes a pantry staple.
Make apple pie biscuits the easy way using this filling for a fast weekend treat.
What is Freezer Apple Pie Filling?
What’s in a name? Freezer Apple Pie Filling is exactly what it sounds like — a saucy, spiced apple mixture cooked just long enough to soften and thicken, then cooled and frozen so you can bake a pie anytime. Why call it “freezer” — because once it’s tucked away in containers, it waits patiently like edible treasure for chilly nights and impromptu guests. Who decided to call it that — a clever baker with an eye for convenience and a love of apples, perhaps? After all, “the way to a man’s heart is through his stomach.” If you crave homemade pie without the last-minute fuss, give this a try and watch skeptical friends become fans.
Why You’ll Love This
- Comforting classic flavor: Tender apple slices in a cinnamon-scented, lightly spiced glaze create a warm, nostalgic bite. The texture is just right — tender apples with a silky sauce that thickens perfectly when baked in a pie.
- Big savings: Making filling at home is far more economical than store-bought pie fillings or ready-made pies. You control the sugar, spice, and the quality of apples, stretching a bushel into several pies and saving money.
- Versatile and flavorful: Use it in pies, crisps, tarts, turnovers, or spoon it warm over ice cream. Top with a crumble, a lattice crust, or serve with a scoop of vanilla for a dessert everyone will rave about.
If you like the convenience of our other make-ahead recipes, you might also enjoy saving time with this freezer apple pie filling guide that pairs perfectly with simple crusts and biscuits. Ready to give it a go? Let’s make some!
How to Make:
Quick Overview
This recipe is straightforward and forgiving. You’ll toss apples with lemon, simmer a simple sugar-thickener mixture until glossy, add the apples to finish cooking, then cool and freeze. Prep time is about 20 minutes, active cooking 10 minutes, and cooling 30–90 minutes before freezing. The standout element is the silky, spiced glaze that clings to each apple slice — no soggy filling here.
Ingredients
- 10 cups peeled, cored, and sliced apples (about 8 large apples; choose a firm variety like Granny Smith, Honeycrisp, or Cortland)
- 2 teaspoons lemon juice (freshly squeezed)
- 1 cup granulated sugar
- 2 teaspoons ground cinnamon
- 1/4 cup cornstarch
- 1/4 teaspoon salt
- 1/4 teaspoon ground nutmeg (optional but recommended)
- 1 1/2 cups water
Directions
- In a large bowl, toss the 10 cups peeled, cored, and sliced apples with 2 teaspoons lemon juice; set aside. Make sure apple slices are evenly coated so they won’t brown while you prepare the glaze.
- In a Dutch oven or large heavy pot over medium heat, combine 1 cup sugar, 1/4 cup cornstarch, 2 teaspoons ground cinnamon, 1/4 teaspoon salt, and 1/4 teaspoon ground nutmeg. Whisk dry ingredients together so there are no lumps.
- Add 1 1/2 cups water and stir to combine. Bring the mixture to a boil over medium heat, stirring constantly to prevent sticking. Allow it to boil for 2 minutes until the mixture thickens and becomes glossy.
- Add the prepared apples to the boiling mixture; return to a boil. Reduce heat to medium-low; cover and simmer, stirring occasionally, until apples are tender but still hold their shape, about 6 to 8 minutes. Test a slice — it should be fork-tender.
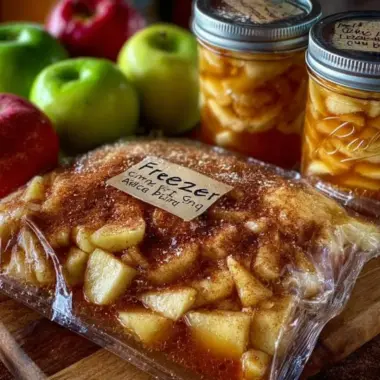
- Remove from heat and cool for 30 minutes. If you plan to freeze, ladle filling into freezer-safe containers, leaving 1/2 inch headspace for expansion. Do not leave at room temperature longer than 1 1/2 hours total. Seal containers tightly and freeze. Stored properly, filling can be kept for up to 12 months.
What to Serve With
- Classic double-crust apple pie or a lattice-topped pie for a traditional dessert
- Puff pastry turnovers or hand pies for a portable treat
- Warm apple crisp topped with oats and brown sugar crumble
- Vanilla ice cream or whipped cream to balance the tartness and warmth
- A warm cup of spiced cider or a cold glass of milk for cozy pairing
Top Tips for Perfecting
- Apple choice matters: Use a mix of sweet and tart apples (e.g., Honeycrisp + Granny Smith) for depth of flavor.
- Slice uniform pieces: Aim for even 1/4-inch slices so all apples cook evenly.
- Control sweetness: Taste the glaze before adding apples; reduce sugar by 1/4 cup if you prefer less sweet.
- Cornstarch slurry: Whisk cornstarch with the dry sugar before adding water to prevent lumps; stirring constantly while boiling ensures smooth thickening.
- Avoid overcooking: Simmer until apples are tender but still hold shape; overcooking makes mushy filling.
- Cool properly: Follow the headspace and cooling window to prevent freezer issues.
Storing and Reheating Tips
- Freezing: Cool filling to room temperature (no more than 1 1/2 hours), then seal in freezer-safe containers or heavy-duty freezer bags with 1/2 inch headspace. Freeze for up to 12 months.
- Refrigeration: If you plan to use within 3–4 days, store in an airtight container in the refrigerator.
- Thawing: Thaw overnight in the refrigerator before using in pies or reheating gently on the stovetop.
- Reheating: For a pie, use filling thawed or slightly frozen; bake according to your pie recipe. For serving warm, reheat gently in a saucepan over low heat until warmed through, stirring occasionally.
FAQs
Can I use frozen apples instead of fresh?
You can, but fresh apples give a better texture. If using frozen, thaw and drain excess liquid before adding to the glaze.
Do I need to peel the apples?
Peeling gives a smoother filling and better texture in pies, but you can leave the peel on if you prefer more rustic texture.
Can I reduce the sugar for a less sweet filling?
Yes. Reduce sugar by up to 1/4 cup without affecting the thickening. Taste and adjust as needed.
How much filling do I need for a 9-inch pie?
About 4 to 5 cups of filling is ideal for a standard 9-inch double-crust pie.
Can I can this filling instead of freezing?
This recipe is formulated for freezing. Canning requires a tested, pressure-canning method to ensure safety; follow a trusted canning recipe if you want shelf-stable jars.
Conclusion
This Freezer Apple Pie Filling is an easy, budget-friendly way to enjoy homemade pie any time of year. It’s fast to make, freezes beautifully, and adds real homemade flavor to pies, crisps, and pastries. Once you try it, you’ll love having a jar ready for last-minute desserts and family gatherings. For more inspiration and a well-tested variation that yields 4–5 pies, check out this trusted version at Freezer Apple Pie Filling! (4-5 Pies). Give it a try, share it with friends, and enjoy pie season all year long.
Freezer Apple Pie Filling
Equipment
- Dutch oven
- Mixing Bowl
Ingredients
Filling Ingredients
- 10 cups Peeled, cored, and sliced apples (about 8 large apples; firm varieties like Granny Smith, Honeycrisp, or Cortland)
- 2 teaspoons Lemon juice (freshly squeezed)
- 1 cup Granulated sugar
- 2 teaspoons Ground cinnamon
- 1/4 cup Cornstarch
- 1/4 teaspoon Salt
- 1/4 teaspoon Ground nutmeg (optional but recommended)
- 1 1/2 cups Water
Instructions
- In a large bowl, toss the 10 cups peeled, cored, and sliced apples with 2 teaspoons lemon juice; set aside.
- In a Dutch oven or large heavy pot over medium heat, combine 1 cup sugar, 1/4 cup cornstarch, 2 teaspoons ground cinnamon, 1/4 teaspoon salt, and 1/4 teaspoon ground nutmeg. Whisk dry ingredients together so there are no lumps.
- Add 1 1/2 cups water and stir to combine. Bring the mixture to a boil over medium heat, stirring constantly to prevent sticking. Allow it to boil for 2 minutes until the mixture thickens and becomes glossy.
- Add the prepared apples to the boiling mixture; return to a boil. Reduce heat to medium-low; cover and simmer, stirring occasionally, until apples are tender but still hold their shape, about 6 to 8 minutes.
- Remove from heat and cool for 30 minutes. If you plan to freeze, ladle filling into freezer-safe containers, leaving 1/2 inch headspace for expansion. Seal containers tightly and freeze.