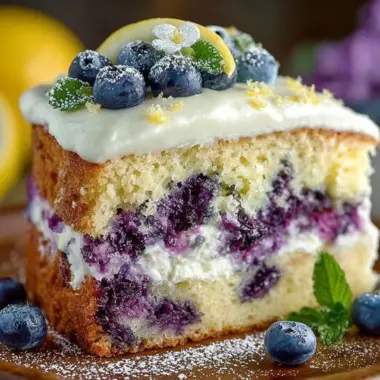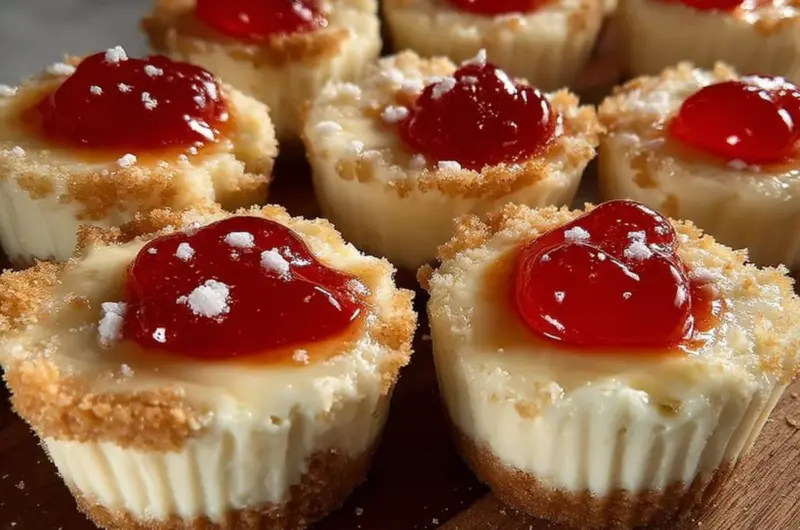
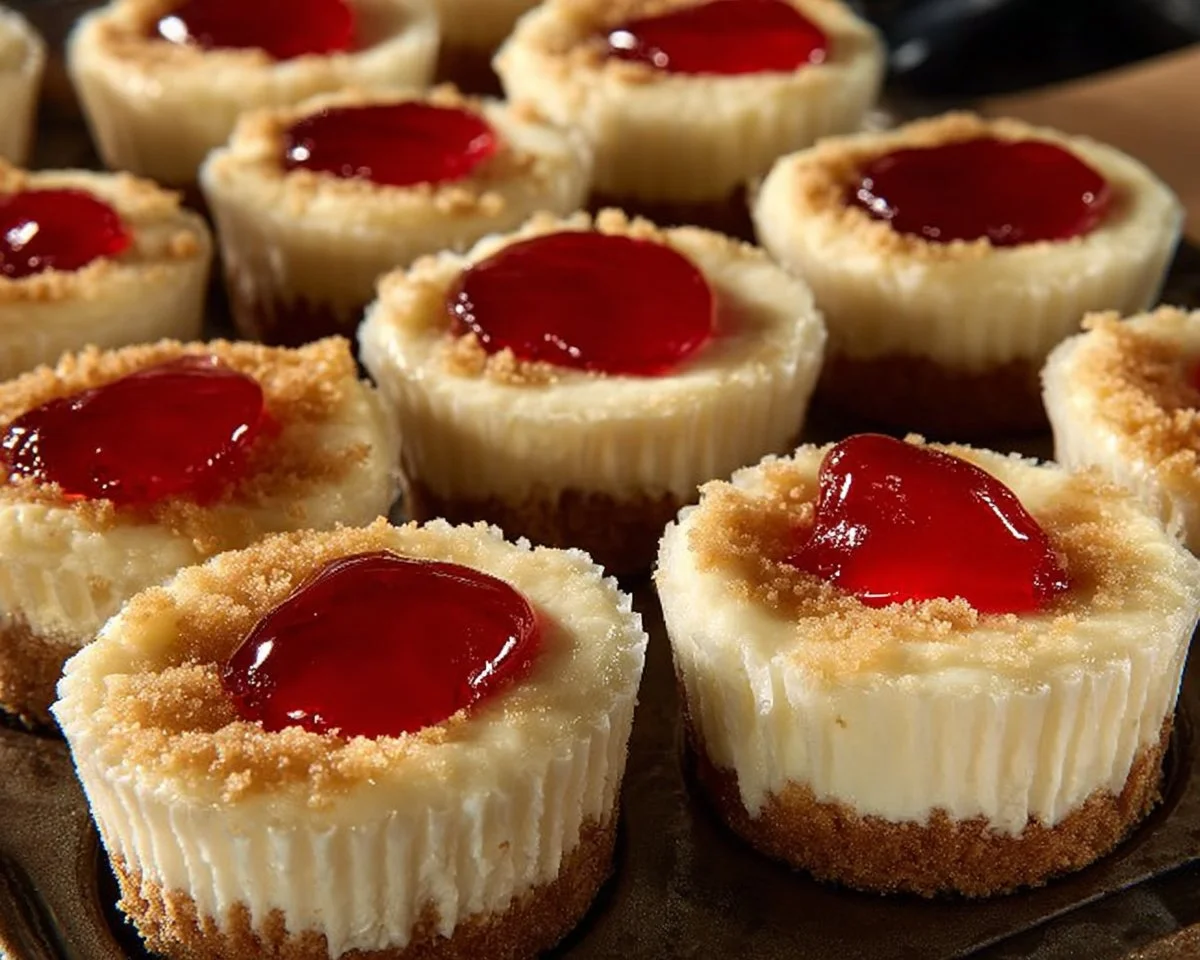
Creamy, dreamy, and perfectly portable — these Mini Cheesecakes are the kind of dessert that steals the show at potlucks, weeknight dinners, and anytime you need a little sweet comfort. Imagine a lush, velvety filling atop a crisp graham cracker crust, all baked in neat bite-sized portions that are as charming as they are delicious. Fun fact: small desserts have been popular since the Victorian era when bite-sized cakes made tea time feel extra special.
This recipe stands out because it’s simple, quick to prep, and totally family-friendly. If you’re new to baking or need a dessert that looks impressive with minimal effort, these are for you. For more variations and inspiration, check out this easy mini cheesecakes recipe that offers a few fun twists. I promise you’ll be hooked after the first buttery bite — and eager to share them.
What is Mini Cheesecakes?
What exactly makes these “mini”? Is it the size, the attitude, or the sneaky way they disappear from the plate? Mini cheesecakes are simply individual cheesecakes baked in muffin tins — portable, perfectly portioned, and ridiculously satisfying. Who wouldn’t love a dessert that lets you indulge without committing to a whole cake? Rumor has it the name came from someone trying to make dessert etiquette easier at a party: fewer crumbs, no cutting, and fewer arguments over the last slice. After all, “the way to a man’s heart is through his stomach.” Ready to try these little charmers for yourself? Grab your muffin tin and let’s go.
Why You’ll Love This
These mini cheesecakes are irresistible for three big reasons. First, the main highlight is the creamy, silky filling that contrasts delightfully with the crispy graham cracker base — each bite is rich but balanced. Second, making them at home saves money compared to store-bought desserts or bakery prices, and you control the ingredients and portion sizes. Third, the variety of toppings — from fresh berries to chocolate ganache — means you can customize flavors to suit any occasion or craving.
Compared to other desserts on the blog, these are far less fussy than a full cheesecake and more versatile than a single-flavor bar. If you love playful twists, you might also enjoy our take on mini oreo cheesecakes for a chocolatey spin. Grab the pan and try them tonight — your family will thank you.
How to Make
Quick Overview
This recipe is easy, fast to prepare, and yields satisfyingly smooth, little cheesecakes every time. The process is straightforward: press a simple graham cracker crust into paper liners, whip together a silky cream cheese filling without over-beating, bake briefly, then chill to set. Expect about 15 minutes active prep and 20 minutes baking, plus 2–3 hours chilling time.
Ingredients
3/4 cup graham cracker crumbs
1 1/2 Tablespoons granulated sugar
4 Tablespoons salted butter, melted
16 oz softened cream cheese (room temperature)
1/2 cup sugar
1/2 cup sour cream
3/4 teaspoon vanilla extract
1/8 teaspoon salt
2 large eggs, lightly beaten
Directions
- Preheat oven to 325F (160C) and line a 12-count muffin tin with paper liners. Set aside.
- In a medium-sized bowl, stir together graham cracker crumbs and 1 ½ Tablespoons sugar. Add melted butter and stir again until ingredients are moistened and completely combined.
- Portion about 2-3 teaspoons of the crust mixture into each liner in your prepared muffin tin. Use a spoon or the clean bottom of a ¼ cup measuring cup to tamp down crumbs so they are evenly packed into the bottom of each liner. Set aside while you prepare your mini cheesecake filling.
- Place cream cheese in the bowl of a stand mixer (or in a large bowl with an electric mixer) and stir on low speed until smooth and creamy.
- Add sugar and stir again until well-combined.
- Add sour cream, vanilla extract, and salt. Stir until ingredients are well-combined, pausing occasionally to scrape the sides and bottom of the bowl.
- Gradually add eggs, one at a time, until just incorporated. Keep the mixer on low speed and do not over-beat.
- Evenly divide batter into muffin tin liners.
- Bake for 17-20 minutes or until edges are just beginning to turn a very light golden brown and centers are set.
- Allow cheesecakes to cool completely, then transfer to refrigerator and chill completely (about 2-3 hours) before serving. If desired, top with whipped cream, strawberry sauce, blueberry sauce, or chocolate ganache!
What to Serve With
Pair these mini cheesecakes with light, bright complements. Fresh berry compote or sliced strawberries bring a burst of acidity that cuts through the richness. Serve with a small scoop of vanilla ice cream for an indulgent duo, or a dollop of lemon curd for a citrusy pop. For beverages, consider freshly brewed coffee, a glass of dessert wine, or herbal tea to balance the sweetness. If you’re serving a full meal, a crisp green salad with a tangy vinaigrette helps keep the menu balanced.
Top Tips for Perfecting
- Use room temperature cream cheese for a lump-free filling; cold cream cheese will make the batter grainy.
- Don’t overbeat the eggs — over-mixing adds air and can cause cracks or a spongy texture. Mix just until incorporated.
- Pack the crust firmly using the bottom of a measuring cup to prevent soggy bottoms.
- Chill fully before serving; chilling helps the filling set and develop its signature creamy texture.
- For flavored variations, fold in 1/4 cup of lemon zest, cocoa powder, or crushed cookies, but avoid adding too much liquid.
- To avoid cracks, bake at a slightly lower temperature if your oven runs hot and remove as soon as the centers are set but slightly jiggly.
Storing and Reheating Tips
Refrigeration: Store mini cheesecakes in an airtight container in the refrigerator for up to 4 days. If topped with whipped cream or fresh fruit, add those just before serving for best texture.
Freezing: To freeze, place the cooled cheesecakes on a baking sheet until solid, then transfer to a freezer-safe container with parchment between layers. Freeze for up to 2 months. Thaw overnight in the fridge before serving.
Reheating: Cheesecakes are best served chilled; avoid microwaving. If you prefer a slightly less-cold dessert, leave them at room temperature for 10–15 minutes before serving.
FAQs
Can I make these without paper liners?
Yes, you can grease the muffin tin lightly and press the crust directly into the wells, but liners make them easier to remove and serve.
Can I use low-fat cream cheese or Greek yogurt?
Low-fat options may alter texture and flavor. Greek yogurt can replace some sour cream but may make the filling tangier and slightly looser.
How do I prevent cracks on the top of the cheesecakes?
Avoid over-mixing and over-baking. Bake until centers are set but still slightly jiggly and cool gradually before chilling.
Can I prepare these a day ahead?
Absolutely. They keep well in the fridge for up to 4 days and are perfect for prepping the day before an event.
What toppings work best?
Fruit sauces, fresh berries, whipped cream, caramel, and chocolate ganache all pair beautifully. Add delicate toppings just before serving for the best presentation.
Conclusion
These Mini Cheesecakes are a little miracle of texture and flavor — rich, creamy centers with a buttery crunch in every bite. Easy to make, budget-friendly, and endlessly customizable, they’re a dessert you’ll rely on for weeknight treats and special occasions alike. Give this recipe a try, share them with friends, and enjoy the smiles they create. For a helpful variation and step-by-step photos, see this excellent guide to Mini Cheesecakes (in a Standard Muffin Pan) – Sally’s Baking.

Mini Cheesecakes
Equipment
- Muffin Tin
- Mixing Bowl
- Stand Mixer
Ingredients
Crust
- 3/4 cup Graham cracker crumbs
- 1.5 Tablespoons Granulated sugar
- 4 Tablespoons Salted butter, melted
Filling
- 16 oz Cream cheese, softened Room temperature
- 1/2 cup Sugar
- 1/2 cup Sour cream
- 3/4 teaspoon Vanilla extract
- 1/8 teaspoon Salt
- 2 large Eggs, lightly beaten
Instructions
- Preheat oven to 325F (160C) and line a 12-count muffin tin with paper liners. Set aside.
- In a medium-sized bowl, stir together graham cracker crumbs and 1 ½ Tablespoons sugar. Add melted butter and stir again until ingredients are moistened and completely combined.
- Portion about 2-3 teaspoons of the crust mixture into each liner in your prepared muffin tin. Use a spoon or the clean bottom of a ¼ cup measuring cup to tamp down crumbs so they are evenly packed into the bottom of each liner. Set aside while you prepare your mini cheesecake filling.
- Place cream cheese in the bowl of a stand mixer (or in a large bowl with an electric mixer) and stir on low speed until smooth and creamy.
- Add sugar and stir again until well-combined.
- Add sour cream, vanilla extract, and salt. Stir until ingredients are well-combined, pausing occasionally to scrape the sides and bottom of the bowl.
- Gradually add eggs, one at a time, until just incorporated. Keep the mixer on low speed and do not over-beat.
- Evenly divide batter into muffin tin liners.
- Bake for 17-20 minutes or until edges are just beginning to turn a very light golden brown and centers are set.
- Allow cheesecakes to cool completely, then transfer to refrigerator and chill completely (about 2-3 hours) before serving. If desired, top with whipped cream, strawberry sauce, blueberry sauce, or chocolate ganache!