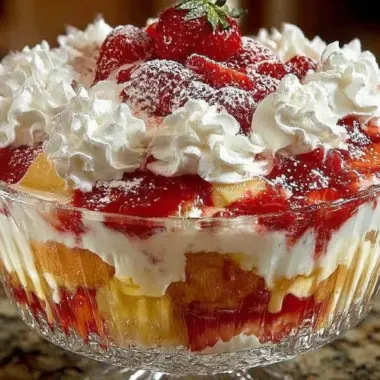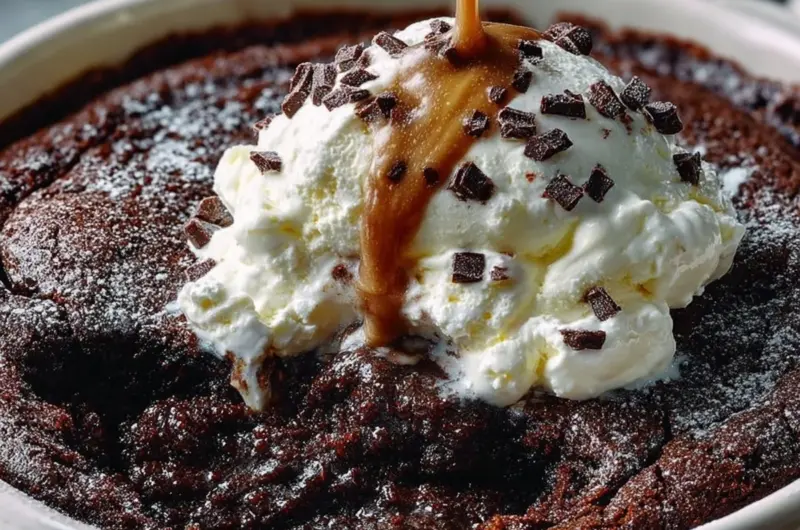
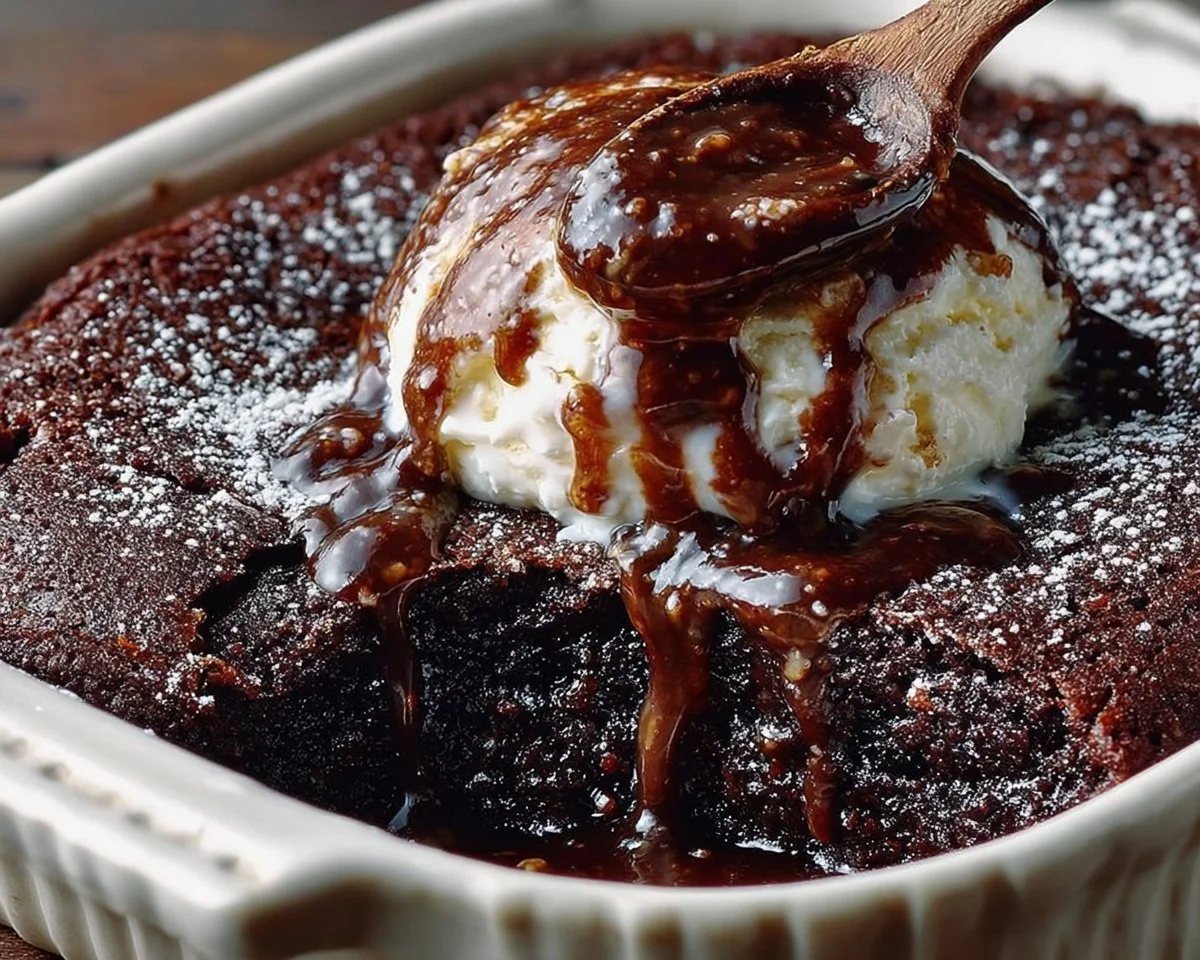
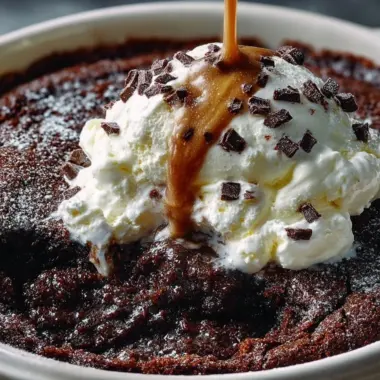
Creamy, fudgy, and impossibly comforting — this Chocolate Cobbler is the kind of dessert that feels like a warm hug on a plate. Ready in under an hour with minimal fuss, it delivers a rich chocolate top and a saucy, pudding-like layer beneath that disappears fast at family dinners. Fun fact: this old-school skillet-style dessert was a mid-century favorite because it used pantry staples and kept ovens from running too long — a practical dessert with maximum reward. If you love simple desserts that taste far fancier than they look, try this version and then compare notes with our other classics like the Chocolate Cobbler recipe on the blog. It’s approachable, quick, and perfect for sharing — let’s get baking!
What is Chocolate Cobbler?
What’s in a name — and why does “cobbler” get to sound so cozy? Traditionally, a cobbler refers to a fruit-filled dessert with a biscuit-like or cake topping, but chocolate cobbler flips that idea into a gooey, chocolate-forward treat. Why call it a cobbler when there’s no fruit? Maybe because the top bakes into lovely peaks and edges, like a cobbled surface. Who knows — perhaps someone once said “the way to a man’s heart is through his stomach,” and chocolate did the rest. Curious? Give this chocolatey spin a try and see if you don’t fall for its charm.
Why You’ll Love This
- Irresistible highlight: The most notable thing about this cobbler is the contrast between the soft, cakey surface and the warm, chocolatey sauce that forms underneath. Each spoonful offers both texture and decadence.
- Cost-saving and simple: Made with basic pantry ingredients, this dessert is kinder to the wallet than a store-bought specialty cake. You’ll get a big, family-sized dessert for very little fuss or expense.
- Flavorful toppings and finishes: A scoop of vanilla ice cream, a drizzle of warm caramel, or a sprinkle of chopped toasted nuts makes this dish sing. The deep cocoa flavor makes it a chocolate lover’s dream.
If you enjoy layered, nostalgic desserts, you’ll find similarities to our baker’s richer cake options, like the Baker’s German Chocolate Cake — it’s a more involved recipe but shares that same chocolate comfort spirit. Ready to bake? Let’s move on to the quick how-to.
How to Make
Quick Overview
This Chocolate Cobbler is delightfully simple: whisk a batter, spread it over melted butter in a baking dish, sprinkle a cocoa-sugar mix, pour hot water on top, and bake. The magic is that the hot water separates the layers so a saucy chocolate filling forms beneath a tender cake top. Expect about 10 minutes active prep and 30–35 minutes baking time for a total of roughly 45 minutes from start to finish.
Ingredients
- 1/3 cup unsalted butter, melted (room-warm or freshly melted)
- 3/4 cup whole milk (room temperature is fine)
- 2 teaspoons vanilla extract
- 1 1/2 cups granulated sugar
- 1 1/4 cups all-purpose flour
- 1/2 cup dark cocoa powder, divided (see directions)
- 2 1/4 teaspoons baking powder
- 3/4 teaspoon salt
- 1 1/2 cups light brown sugar, packed
- 1 1/2 cups hot water (just boiled or very hot from the kettle)
Directions
- Preheat your oven to 350°F (175°C). Have a 9×13-inch baking dish ready.
- Pour the melted butter into a 9×13-inch baking dish, spreading it evenly over the bottom so the butter creates a thin shiny layer.
- In a large bowl, whisk together the milk, vanilla extract, and granulated sugar until the sugar is mostly dissolved and the mixture is smooth.
- Add the flour, 1/4 cup of the dark cocoa powder, baking powder, and salt to the bowl. Whisk until just combined and no dry streaks remain — don’t overmix.
- Gently spoon the batter over the butter in the baking dish, spreading it so it covers the butter. Do not stir or mix the batter into the butter.
- In a small bowl, combine the remaining 1/4 cup dark cocoa powder with the packed light brown sugar. Sprinkle this cocoa-brown sugar mixture evenly over the top of the batter.
- Carefully pour the hot water over the top of the sugar layer. Pour slowly and gently so you don’t disturb the batter — again, do not stir.
- Bake for 30–35 minutes, or until the top is set and dry. The top should look cakey while the inside beneath will be sauce-like.
- Let cool slightly before serving so the sauce thickens just right — about 10 minutes. Serve warm with ice cream or whipped cream.
What to Serve With
- A scoop of vanilla bean ice cream or salted caramel gelato for contrast.
- Fresh berries or macerated strawberries to brighten the richness.
- Dollops of whipped cream and a dusting of extra cocoa powder.
- Espresso, strong coffee, or a dessert wine to round out the cocoa intensity.
- For a casual family night, serve with plain Greek yogurt sweetened lightly with honey for tang and balance.
Top Tips for Perfecting
- Cocoa choice: Use a good-quality dark cocoa powder for a deep chocolate flavor; Dutch-process cocoa will be richer, natural cocoa will be tangier.
- Hot water is vital: Don’t skimp on the water temperature — it helps the sauce form. Boiling or very hot water gives the best result.
- Baking time: Ovens vary. Start checking at 28 minutes; you want the top set but not overly browned.
- Texture tweak: For a slightly cakier result, reduce the hot water to 1 1/4 cups; for saucier, stick with 1 1/2 cups.
- Add-ins: Stir in a cup of chopped nuts or chocolate chips sprinkled over the batter for crunch and extra chocolate pockets.
- Avoid stirring after adding water: Mixing ruins the layer separation that creates the cobbler’s signature sauce.
Storing and Reheating Tips
- Refrigeration: Cover tightly with plastic wrap or place in an airtight container. Keeps well for up to 4 days in the fridge.
- Freezing: Freeze in a sealed, freezer-safe container for up to 2 months. Thaw in the refrigerator overnight before reheating.
- Reheating: Warm individual portions in the microwave for 25–40 seconds until warm, or reheat a larger portion in a 325°F oven for 10–15 minutes. Add a few seconds less for bowls with ice cream so it doesn’t melt instantly.
- Best served: Warm with a scoop of ice cream for the ideal contrast of temperatures.
FAQs
Can I use cocoa substitutes like Nesquik or flavored cocoa?
It’s best to use pure cocoa powder (natural or Dutch-process) for depth of chocolate flavor. Instant drink mixes often contain sugar and flavorings that will change texture and sweetness.
Can I make this gluten-free?
Yes. Replace the all-purpose flour with a 1:1 gluten-free baking flour blend that contains xanthan gum. Texture may be slightly different but still delicious.
Is it possible to reduce sugar?
You can reduce granulated sugar slightly (up to 1/3 cup less) but the brown sugar layer helps create the sauce. If reducing sugar, consider adding a tablespoon of maple syrup to preserve some saucy texture.
Can I prepare this ahead of time?
You can assemble through step 6 and refrigerate for a few hours before pouring the hot water and baking. If you refrigerate assembled, add a few extra minutes to baking time.
Why is my cobbler not saucy underneath?
Most likely the water wasn’t hot enough or the sugar layer was disturbed. Ensure hot water is used and do not stir after adding water. Also check that you used the correct brown sugar amount and packed it before measuring.
Conclusion
This Chocolate Cobbler is a cozy, easy-to-make dessert that looks and tastes like a celebration with very little effort. It’s ideal for busy weeknights, potlucks, or anytime you want a chocolate fix without fuss. If you’d like to explore another classic take on old-fashioned chocolate cobbler recipes for inspiration, check out this Old-Fashioned Chocolate Cobbler recipe for a slightly different approach and more tips. Give this recipe a try, share it with family, and enjoy those warm, chocolatey spoonfuls together.
Chocolate Cobbler
Equipment
- 9x13-inch Baking Dish
- Mixing Bowl
Ingredients
Ingredients
- 1/3 cup unsalted butter, melted room-warm or freshly melted
- 3/4 cup whole milk room temperature is fine
- 2 teaspoons vanilla extract
- 1 1/2 cups granulated sugar
- 1 1/4 cups all-purpose flour
- 1/2 cup dark cocoa powder, divided see directions
- 2 1/4 teaspoons baking powder
- 3/4 teaspoon salt
- 1 1/2 cups light brown sugar, packed
- 1 1/2 cups hot water just boiled or very hot from the kettle
Instructions
- Preheat your oven to 350°F (175°C). Have a 9×13-inch baking dish ready.
- Pour the melted butter into a 9×13-inch baking dish, spreading it evenly over the bottom so the butter creates a thin shiny layer.
- In a large bowl, whisk together the milk, vanilla extract, and granulated sugar until the sugar is mostly dissolved and the mixture is smooth.
- Add the flour, 1/4 cup of the dark cocoa powder, baking powder, and salt to the bowl. Whisk until just combined and no dry streaks remain — don’t overmix.
- Gently spoon the batter over the butter in the baking dish, spreading it so it covers the butter. Do not stir or mix the batter into the butter.
- In a small bowl, combine the remaining 1/4 cup dark cocoa powder with the packed light brown sugar. Sprinkle this cocoa-brown sugar mixture evenly over the top of the batter.
- Carefully pour the hot water over the top of the sugar layer. Pour slowly and gently so you don’t disturb the batter — again, do not stir.
- Bake for 30–35 minutes, or until the top is set and dry. The top should look cakey while the inside beneath will be sauce-like.
- Let cool slightly before serving so the sauce thickens just right — about 10 minutes. Serve warm with ice cream or whipped cream.